Disclosure: PostureRanked is reader-supported. When you buy through links on our site, we may earn an affiliate commission at no additional cost to you. Our recommendations are based on independent research.
| Product | Price | Rating |
|---|---|---|
| Ergotron LX Monitor Arm | $214 | 9.2 |
| Logitech ERGO K860 Wireless Split Keyboard | $129 | 8.8 |
| Branch Ergonomic Chair | $299 | 8.3 |
| Logitech MX Vertical Wireless Mouse | $99 | 8.5 |
Disclosure: PostureRanked is reader-supported. When you buy through links on our site, we may earn an affiliate commission at no extra cost to you. Learn more
Shoulder pain is one of the most common complaints from desk workers in 2026 — and it’s rarely caused by a single problem. More likely, you’re dealing with a combination of a monitor that’s too high or too low, a keyboard that’s pulling your arms inward, and armrests that are the wrong height. Fix one thing and you might get 30% better. Fix all three and the pain often disappears.
This guide covers the real mechanics of desk-related shoulder pain, which specific setups cause it, and exactly what to change to fix it. We’ve also included four gear recommendations that address the most common root causes — all available on Amazon with verified pricing.
If you want the fastest fix: A monitor arm is the highest-impact single purchase. Getting your screen to eye level eliminates the compensations that load your shoulders all day long. The Ergotron LX ($214) is the one to get.
Why Desk Work Causes Shoulder Pain
Your shoulder is not designed to be held in a static position for hours. The muscles that support it — your upper traps, rotator cuff, and rhomboids — rely on movement to stay healthy. When you sit at a desk, you force those muscles to hold a fixed position under load. Over time, this creates chronic tension, impingement, and sometimes radiating pain into the neck and arms.
The specific causes break down like this:
Monitor position. When your screen is too low, you drop your chin and round your upper back. When it’s too high, you crane your neck and shrug your shoulders up. Both patterns load your upper traps and lead to the same burning, aching tension. Most people have their monitor too low — your eyes should land at the top third of the screen, not the middle.
Keyboard placement. If your keyboard is too far from your body, you’re reaching forward for every keystroke. That constant forward reach engages your anterior deltoid and pec minor, and over time, it pulls your shoulder into internal rotation — the position that causes impingement. Narrow keyboards also pull your arms inward toward the center of your desk, which closes off the shoulder joint.
Armrest height. Armrests that are too low force your shoulders to drop and round. Armrests that are too high force your shoulders to shrug. Both are painful over time. Most standard office chairs have fixed or barely adjustable armrests that don’t match the geometry of your desk — so your arms end up floating, unsupported, for hours.
Fix 1: Get Your Monitor at Eye Level
This is the highest-return fix you can make. A monitor arm lets you position your screen precisely — at the right height, at the right distance, without a pile of books or a wobbly riser under it.
Ergotron LX Monitor Arm
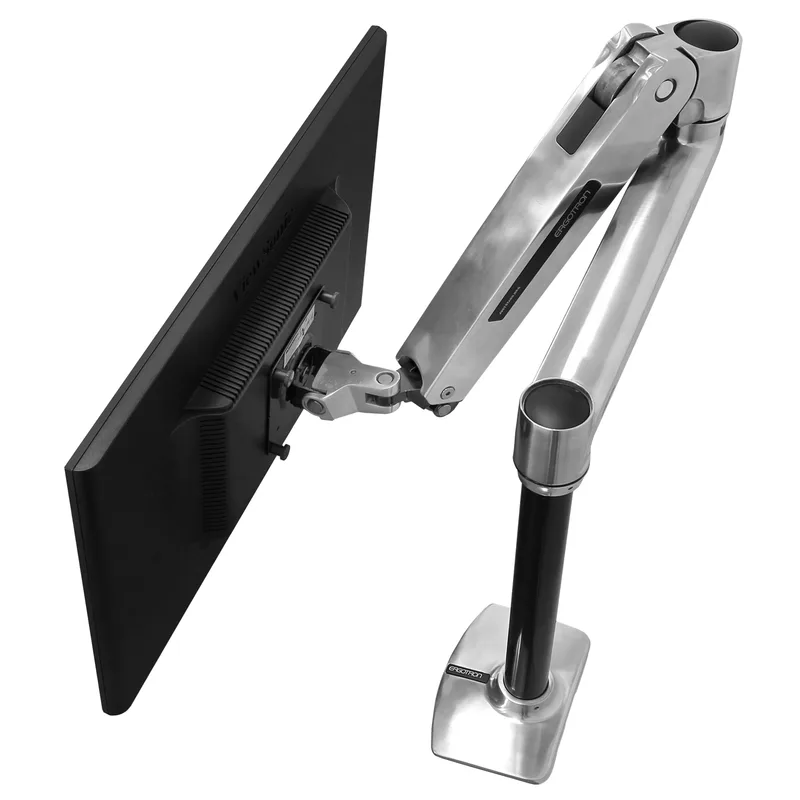
The Ergotron LX is the benchmark. It handles monitors up to 34 inches and 25 lbs, covers VESA 75x75 and 100x100 mounts, and has a 20-inch arm reach. The tension is adjustable so it stays where you put it. After years of owner reviews and consistent professional recommendations, it remains the go-to choice for anyone serious about monitor positioning.
The 10-year warranty is what separates it from cheaper arms — Ergotron backs this thing properly. At $214, it costs more than bargain options, but you’re paying for a product that doesn’t sag, wobble, or strip out after six months.
Once mounted, position your screen so your eyes naturally land at the top third of the display when you’re sitting upright. You shouldn’t be tilting your head to read — the screen tilts to meet your eyes.
For more options at different price points, see our guide to the best monitor arms for standing desks.
Fix 2: Bring Your Keyboard Closer and Split It
Two changes, both matter:
Bring the keyboard closer. Your elbows should be bent at roughly 90–100° with your upper arms hanging naturally at your sides. If you’re reaching forward even a few inches, you’re loading your anterior shoulder with every keystroke. Push everything else out of the way and get the keyboard as close to your body as possible.
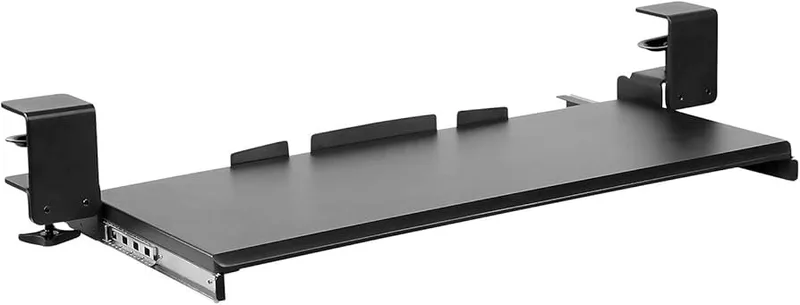
A keyboard tray mounted under the desk can help if your desk is too deep — see our roundup of the best keyboard trays for standing desks for options that work at any height.
Switch to a split keyboard. A standard keyboard positions your hands closer together than your shoulders naturally fall. That inward angle — called ulnar deviation — causes a chain reaction up the arm that loads the shoulder. A split or ergonomic keyboard keeps your hands shoulder-width apart, which is a more neutral position for the entire upper limb.
Logitech ERGO K860 Wireless Split Keyboard
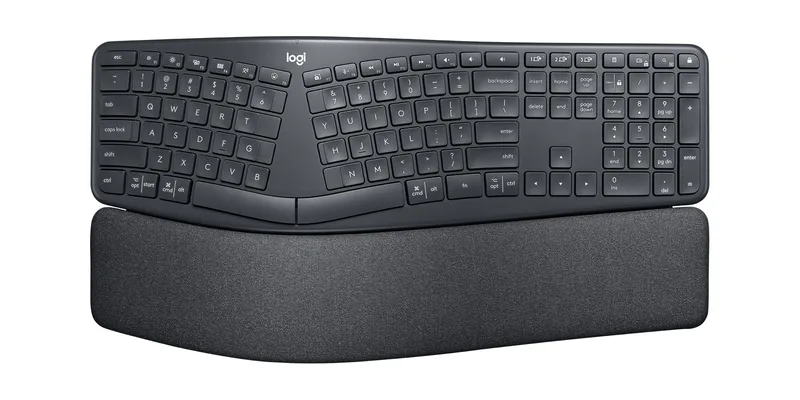
The K860 is the most practical split keyboard for people who type all day without wanting to rebuild their entire workflow. It’s a fixed curved split — not a fully modular keyboard — which means you adapt to it quickly (usually 1–2 weeks) without the steep learning curve of fully separated designs.
The negative tilt (raising the front edge of the keyboard) is the other key feature. Most people type with their wrists in slight extension, which loads the forearm and indirectly loads the shoulder. The K860’s slope promotes neutral wrist position, reducing that chain of tension.
Built-in memory foam wrist rest is included. Battery lasts up to 24 months on AAA batteries. Works via Bluetooth or Logi Bolt USB receiver. At $129, it’s the most accessible split keyboard with this feature set.
For a deeper dive on ergonomic keyboard options, see our full guide to the best ergonomic keyboards for programmers.
Fix 3: Fix Your Armrests
This is the most underrated fix. Most people have armrests that don’t match their desk height, so they end up either shrugging their shoulders up to reach them or letting their arms dangle unsupported. Both are problematic.
Correct armrest height: Your forearms should rest on the armrests with your shoulders relaxed — not elevated, not drooping. Your elbows should be at roughly the same height as your desk surface. If your armrests are too high, lower them. If your chair doesn’t go low enough, or if the armrests are fixed, you need a different chair.
Armrest width: Pull your armrests in to just under your shoulders. Most people leave them at default width, which is often too wide, causing your elbows to flare out — an unnatural position that strains the shoulder joint.
Branch Ergonomic Chair
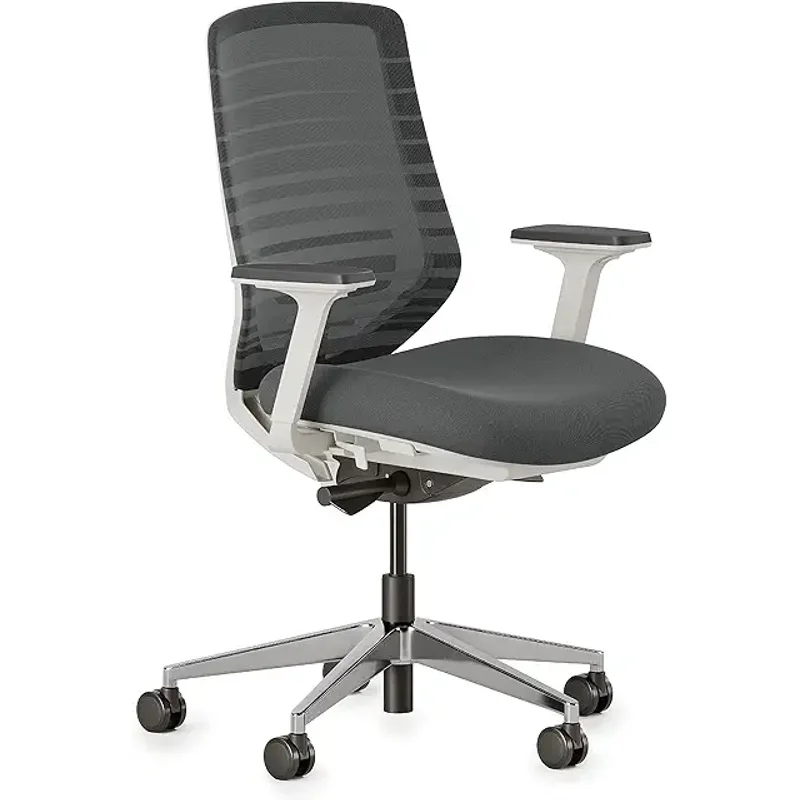
The Branch Ergonomic Chair has 4D armrests — height, width, depth, and pivot angle. At $299, this is the most adjustment you’ll find under $400. Getting armrests that actually adjust to your body means you can set them correctly instead of adapting yourself to a fixed position.
The mesh back is breathable and holds its shape through long sessions. Eight total adjustment points at this price is unusual — most mid-range chairs offer four or five. The seat depth slider is worth noting for shoulder pain specifically: a proper seat depth means you can sit fully back in the chair with lumbar support engaged, which takes the strain off your upper back and shoulders.
The 2-year warranty is shorter than Herman Miller or Steelcase, which is a fair tradeoff at this price. For more options at different budgets, see our guide to the best ergonomic desk chairs under $500.
Fix 4: Use an Ergonomic Mouse

Your mouse hand might be causing more shoulder problems than you realize. A standard flat mouse puts your forearm in pronation — rotated palm-down. Holding that position for hours tightens the muscles that run from your forearm up through your shoulder, contributing to the same impingement pattern as poor keyboard placement.
A vertical mouse addresses this by rotating the grip 57–90° into a handshake position. This isn’t a gimmick — it’s mechanically sounder for the forearm and shoulder complex.
Logitech MX Vertical Wireless Mouse
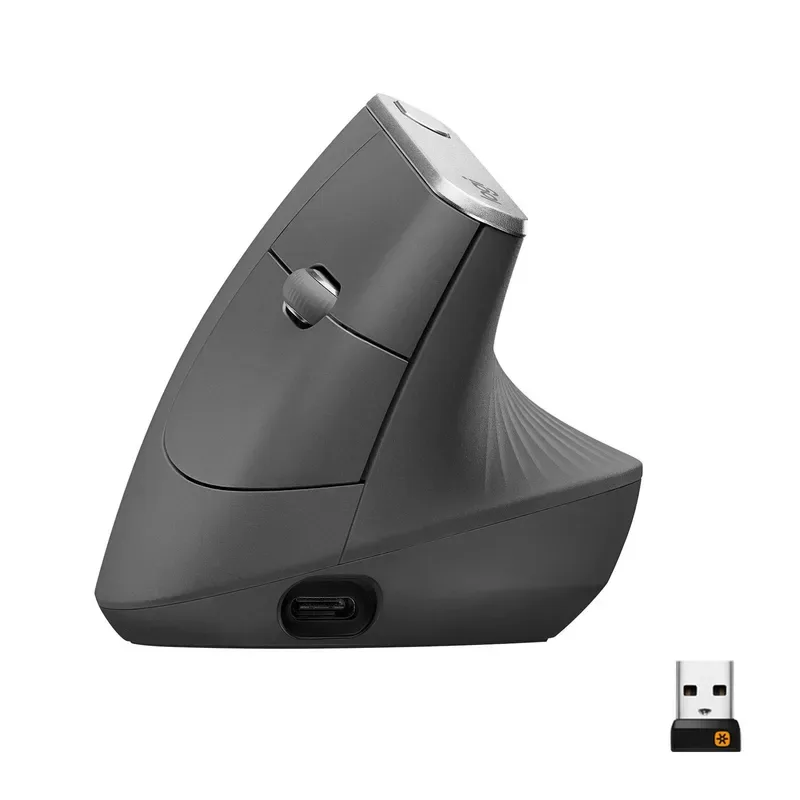
The MX Vertical is the most accessible vertical mouse for people transitioning from a standard flat mouse. The 57° angle is a compromise — not fully vertical like some specialty mice, but enough to reduce forearm rotation significantly. Full-size feel means you don’t need to pinch or grip tightly, which is where smaller vertical mice fail for long sessions.
At $99, it’s mid-range for ergonomic mice. The 4000 DPI sensor means you can cover the full screen with minimal arm movement, which reduces how much you engage your shoulder just to move the cursor.
If you prefer a trackball (which eliminates arm movement entirely), see our roundup of the best ergonomic trackball mice for alternatives.
Quick Shoulder Relief: Exercises to Add Today
Gear changes help structurally, but you also need to address the tension that’s already built up. These movements take under five minutes and can be done at your desk:
Doorway chest stretch — Stand in a doorway, arms at 90°, step forward until you feel a stretch across your chest and front of your shoulders. Hold 30 seconds. This counters the internal rotation pattern that builds from keyboard work.
Shoulder rolls — Roll shoulders backward in a full circle, 10 reps. Forward-rolled shoulders are a symptom of tight pecs and weak mid-back muscles. Rolling backward activates the muscles that pull them back into alignment.
Chin tucks — Sit tall, gently pull your chin straight back (think “double chin”). Hold 5 seconds, repeat 10 times. This resets the forward head position that loads the upper traps and shoulders.
Band pull-aparts — If you have a resistance band, hold it at chest height with straight arms and pull it apart until your arms are fully spread. This activates the posterior rotator cuff and mid-traps — the muscles that get chronically underloaded from desk work.
Do these two to three times per day. Set a timer if you forget.
Comparison Table
| Product | Price | Primary Benefit | Best For |
|---|---|---|---|
| Ergotron LX Monitor Arm | $214 | Eye-level monitor positioning | Anyone with neck or shoulder strain from screen angle |
| Logitech ERGO K860 | $129 | Shoulder-width hand position | Reducing inward keyboard tension |
| Branch Ergonomic Chair | $299 | 4D adjustable armrests | People with poor armrest support |
| Logitech MX Vertical | $99 | Neutral forearm grip | Reducing shoulder strain from mouse use |
Frequently Asked Questions
What is the most common cause of shoulder pain from desk work?
The most common cause is a combination of a monitor at the wrong height and a keyboard placed too far from the body. Both force compensatory postures that chronically load the shoulder muscles. Monitor position is the highest-impact fix — getting the screen to eye level eliminates the head-forward posture that causes most upper-body tension.
How long does it take for shoulder pain to improve after ergonomic changes?
Based on user reports, most people notice improvement within 1–2 weeks of making significant ergonomic changes (monitor height, keyboard position, armrest adjustment). Chronic issues that have built up over months may take longer to fully resolve. Adding targeted stretches and movement breaks accelerates recovery.
Is a split keyboard really worth it for shoulder pain?
Yes, for most people. A standard keyboard pulls your hands inward toward the center of your desk, creating an unnatural shoulder angle you hold for hours. Split keyboards keep your hands at shoulder width. The Logitech K860 is the least disruptive transition — it takes about two weeks to fully adapt but the ergonomic benefit is real.
Should I use a vertical mouse for shoulder pain?
A vertical mouse helps if your symptoms include forearm tightness or discomfort that radiates up to the shoulder. The ergonomic benefit comes from reducing forearm pronation, which reduces tension in the kinetic chain from wrist to shoulder. If your shoulder pain is more related to reach distance or keyboard width, fixing those issues first will have a bigger impact.
How high should armrests be set for shoulder health?
Your armrests should be at a height where your shoulders are relaxed — neither elevated nor drooping — when your forearms rest on them. Your elbows should be at roughly the same height as your desk surface, with your forearms resting lightly, not bearing significant weight. Getting this right often requires 4D adjustable armrests that can move in and out, forward and back, not just up and down.
Can I fix shoulder pain without buying new equipment?
Partially. Free fixes include: moving your keyboard closer to the edge of your desk, lowering your chair so your feet are flat and your elbows are at desk height, and using books or a monitor riser to raise your screen to eye level. These help but have limits — improvised risers wobble, standard armrests may not adjust enough, and a flat keyboard still narrows hand placement. The gear changes are the durable solution.
Conclusion
Desk-related shoulder pain is almost always fixable with the right setup. The priority order:
- Get your monitor at eye level — Ergotron LX is the standard for a reason ($214)
- Bring your keyboard closer and switch to split — Logitech K860 handles both ($129)
- Fix your armrests — Branch Ergonomic Chair has the 4D adjustability to get this right ($299)
- Switch to a vertical mouse — MX Vertical reduces forearm-to-shoulder tension ($99)
You don’t have to do all four at once. Start with the monitor arm — it’s the fix with the highest return for the most people — and work from there. Add the exercises listed above and you should feel a meaningful difference within two weeks.
The pain isn’t inevitable. It’s a setup problem, and setup problems have solutions.