Disclosure: PostureRanked is reader-supported. When you buy through links on our site, we may earn an affiliate commission at no additional cost to you. Our recommendations are based on independent research.
| Product | Price | Rating |
|---|---|---|
| Secretlab TITAN Evo 2026 | $669 | 9.2 |
| FlexiSpot E7 Pro | $479 | 8.8 |
| Ergotron LX Single Monitor Arm | $199 | 9.2 |
| SteelSeries QcK XXL | $46 | 9.1 |
| HyperX Wrist Rest | $22.99 | 9.0 |
Disclosure: PostureRanked is reader-supported. When you buy through links on our site, we may earn an affiliate commission at no extra cost to you. Learn more
Secretlab’s April 2026 lineup expansion — adding new chair variants and a limited-edition Mandalorian Titan Evo for Star Wars Day — is a signal the gaming chair market has matured. Ergonomics are no longer a premium add-on. They’re table stakes. Meanwhile, height-adjustable gaming desks have crossed a price threshold where they now cost roughly the same as a mid-range fixed gaming desk, removing the last real excuse to skip one.
If you’re building your first serious gaming station — or auditing an existing one — this guide walks you through every element in priority order: chair, desk, monitor arm, peripherals, and lighting. Each section covers the ergonomic principles and our top pick for that category.
In a hurry? The Secretlab TITAN Evo 2026 is the chair, the FlexiSpot E7 Pro is the desk, and the Ergotron LX is the monitor arm. Pair those three and you’ve solved 90% of long-session ergonomics.
Step 1: Get the Chair Right First
Everything else in your setup depends on your chair height. Desk height, monitor height, keyboard angle — they all flow from where your body sits. Set the chair first, then calibrate everything else to match.
The goal: feet flat on the floor, knees at a 90–100° angle, thighs parallel to (or slightly angled down toward) the floor. If your feet dangle, the chair is too high. If your knees rise above your hips, it’s too low.
Lumbar support: Position it at the inward curve of your lower back — roughly belt height. It should feel like gentle pressure from behind, not like you’re being pushed forward. If your chair has an adjustable lumbar, dial it in so you’re not having to hold your lower back in position — the support should do that for you.
Armrests: Set them so your elbows rest at roughly 90° with your hands on the keyboard. Armrests set too high shrug your shoulders up. Too low and you’ll start hunching to reach them.
For more detail on dialing in your chair position, the gaming posture guide covers every adjustment with specific measurements.
Secretlab TITAN Evo 2026 — Editor’s Pick for Gaming Chairs

For most gamers, the TITAN Evo is the clearest recommendation in the mid-range. It comes in three sizes (S, R, XL) — which matters more than most people realize. Most gaming chairs are one-size-fits-most, which means they fit medium builds and nobody else especially well. The three-size system means the proportions are actually right for short gamers and taller ones.
The built-in 4-way lumbar is the other differentiator. You’re not adding a pillow to a chair that wasn’t designed for lumbar support — the support is part of the frame. It adjusts up/down and in/out to sit exactly where your spine needs it.
At $579, it sits between budget gaming chairs and the Herman Miller tier. If you want to go deeper on gaming chair options, our full gaming chair roundup covers everything from $180 to $1,595.
Step 2: Set Your Desk to Sitting Elbow Height
Once your chair is dialed in, stand next to it and measure the height of your elbows when your arms hang naturally at your sides. That measurement — typically somewhere between 26” and 30” depending on your height — is your target desk height.
With a fixed desk, you’re stuck with the desk’s height and have to compensate with your chair. With a height-adjustable desk, you set the desk to match the chair instead of the reverse.
Why sit-stand matters for gaming: The argument for standing desks in office work is well-known — break up the sedentary time, reduce lower back loading. For gaming, the benefit is slightly different. Standing during lower-intensity moments (loading screens, waiting in lobbies, watching streams) reduces the total time you spend in the same static posture without requiring you to interrupt actual play.
The standing desk also solves a practical problem: most fixed gaming desks are built at a standard 29–30” height that’s correct for average-height men. For anyone shorter or taller, or for anyone who wants the flexibility to raise the desk for a monitor mount or standing mat, that fixed height creates friction.
FlexiSpot E7 Pro — Best Value Height-Adjustable Desk
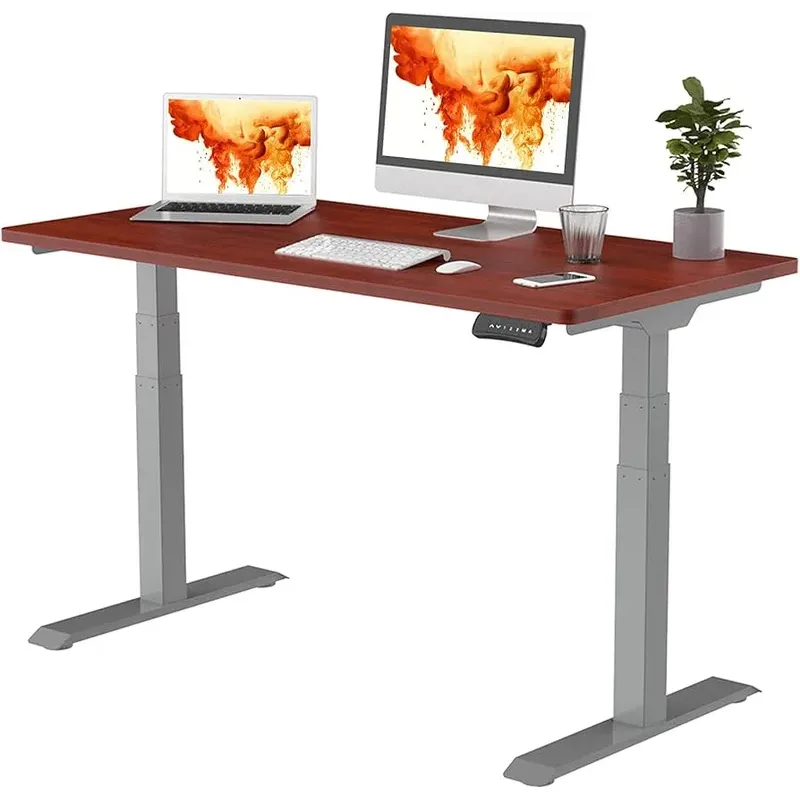
The E7 Pro’s 22.8”–48.4” height range covers essentially every body type from short sitting positions to standing positions for people up to about 6’5”. The dual-motor, 3-stage legs reach full height smoothly and hold steady under heavy loads — owner reports consistently cite stability with dual-monitor setups and PC towers on the surface.
At $479 with desktop included, it undercuts the Uplift V2 and Flexispot’s own E7 Plus by a meaningful margin while keeping the most important spec: the 355 lb load capacity.
For a deep dive on standing gaming desks, see our best standing gaming desks roundup.
Step 3: Mount Your Monitor at Eye Level
The most common gaming monitor setup error: monitor sitting directly on the desk, screen center below eye level. That position pulls your chin down and rounds your upper back. Over a 3-hour session, the muscle fatigue compounds quickly.
Correct position: The top edge of your monitor should be at or slightly below your eye level when seated in your normal gaming position. Your gaze will naturally land in the upper-middle of the screen at a comfortable 10–20° downward angle — which is exactly where your cervical spine wants to be.
Viewing distance: Arm’s length as a rough rule. For exact guidance by screen size, the gaming monitor ergonomics guide has a full table.
A monitor arm solves all of this. It lets you set the height precisely, push the screen back to the right viewing distance, and swing it out of the way when you’re not gaming. It also reclaims the desk space underneath the stand.
Ergotron LX Single Monitor Arm — Editor’s Pick for Monitor Arms
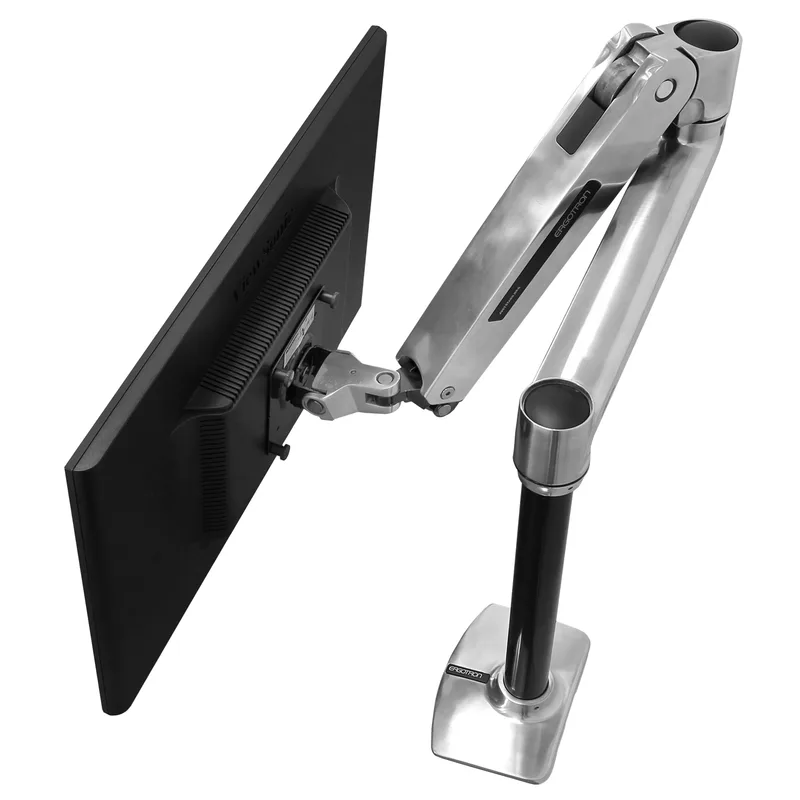
The LX is the monitor arm that every other arm is compared against. The gas-spring mechanism holds your monitor in position without any locking or loosening — you tension it once to match your monitor’s weight, and from that point on it floats. Grab the bezel and move it where you want it.
The 13-inch horizontal reach is enough for most desk depths, and the full height, tilt, and rotation range covers every positioning scenario. At $199 with a 10-year warranty, it’s the obvious recommendation for the vast majority of single-monitor gaming setups (24”–34”, up to 25 lbs).
Running a heavy 34”+ ultrawide? Step up to the Ergotron HX instead. For more options, see our best monitor arms for gaming roundup.
Step 4: Keep Your Keyboard and Mouse Close
The keyboard should be close enough that your elbows stay roughly at your sides when your hands are on the keys. Reaching forward to a keyboard that’s too far away rotates the shoulders forward, compresses the chest, and loads the neck. Most people who move to a proper monitor arm find their natural keyboard distance gets shorter — the desk depth that used to be eaten by the monitor stand is now open workspace.
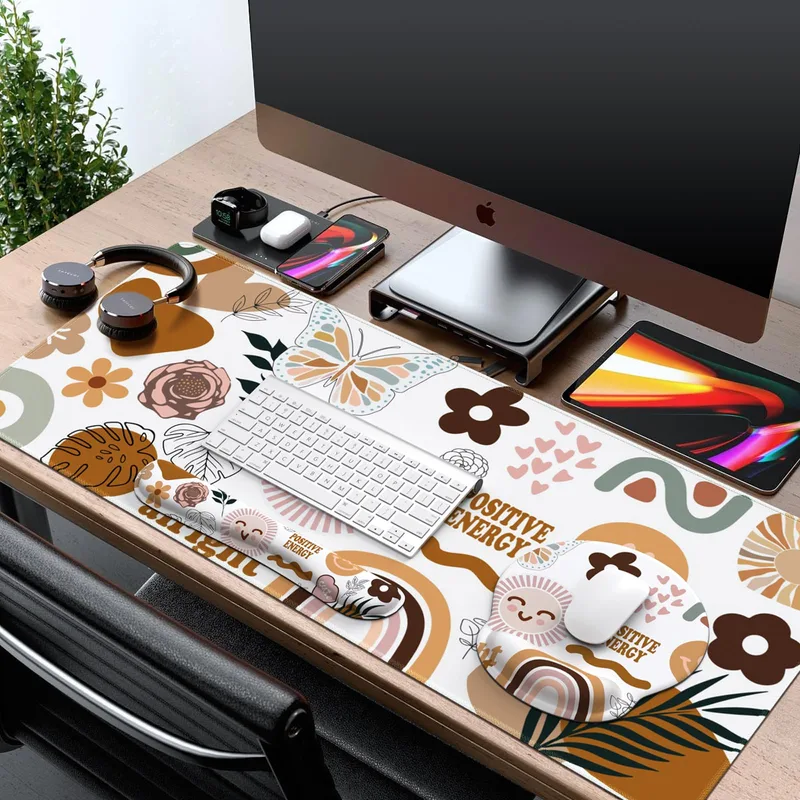
Mouse placement: Same height as the keyboard, as close to your centerline as possible. Your mouse arm should travel in front of your body, not out to the side. Wide desk pads that let you move freely without your mouse running off the edge are worth the $25–$35 investment.
Wrist position: Flat and neutral — not bent up toward the ceiling (extension) or angled down (flexion). Wrist rests are for resting between mouse movements and during pauses in keyboard input, not for supporting your wrist while you’re actively mousing. Active mousing should happen with a floating wrist.
SteelSeries QcK XXL — Top Desk Pad Pick
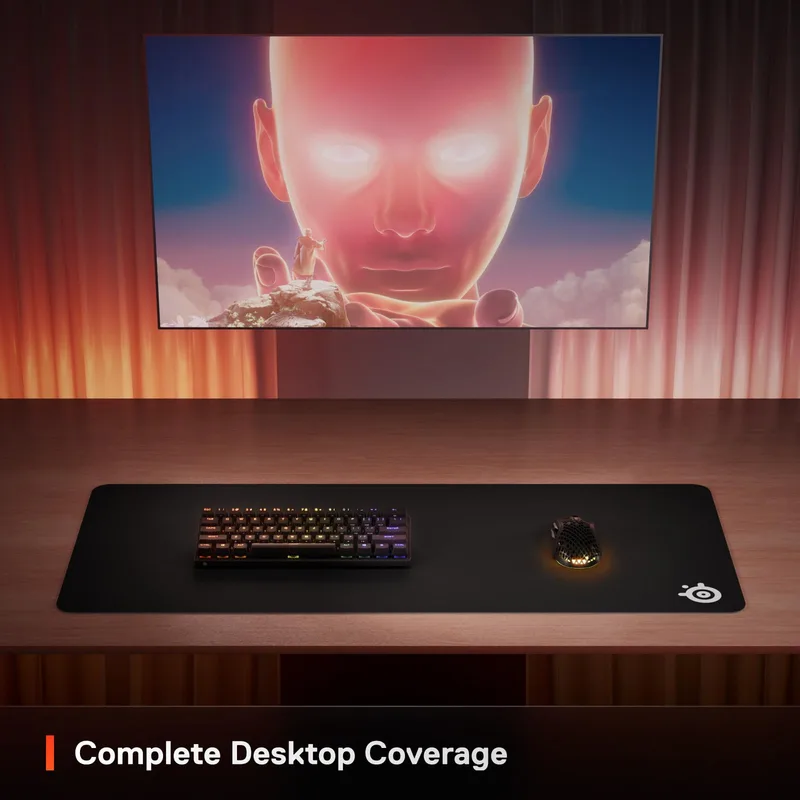
The QcK line has been the reference surface for competitive gaming for over a decade. The XXL version brings that surface up to full-desk scale: 35”×15.75” covers most standard gaming desks edge to edge, creating a unified surface for keyboard, mouse, and everything in between.
The micro-woven cloth balances glide speed and control — fast enough for sweeping movements, controlled enough for precise tracking. At $46, it’s one of the clearest value-to-quality ratios in any gaming accessory category. See our best gaming desk pads roundup for more options including RGB and extended coverage picks.
HyperX Wrist Rest — Top Keyboard Rest Pick
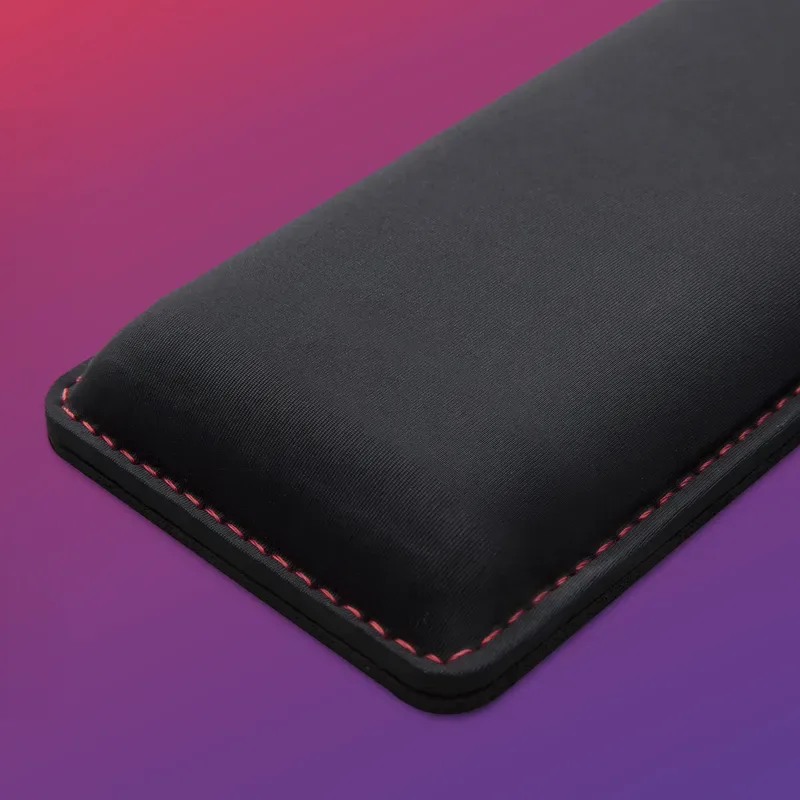
The HyperX Wrist Rest pairs well with any full-size or TKL keyboard. The cooling gel memory foam handles heat better than straight foam, and the velour surface is noticeably more comfortable than the synthetic leather on most gaming wrist rests. At 0.9” low-profile height, it doesn’t raise your wrists above keyboard height — which matters for maintaining neutral wrist position.
For a broader look at wrist rest options, see best wrist rests for gaming.
Step 5: Manage Your Lighting
Eye strain and postural problems compound each other. When your eyes fatigue, you lean forward to see the screen better. That forward lean puts load on your cervical spine, tightens your upper traps, and leads to the neck-and-shoulder stiffness that follows long gaming sessions.
Two fixes:
-
Bias lighting: A strip of LED lights behind your monitor — pointed at the wall, not at your eyes — reduces the contrast between a bright screen and a dark wall. That contrast is what taxes your eyes in a dark room. A $15–$25 LED strip does the same job as a $70 branded product.
-
Room lighting: Match your room brightness to the general brightness of your screen. A completely dark room with one bright monitor is hard on your eyes over time. A well-lit room that matches the monitor’s output is much more comfortable for multi-hour sessions.
Window placement: Set your desk so the monitor faces away from windows. Direct sunlight on your screen creates glare that no brightness setting fully compensates for.
Step 6: Build a Break Routine
No chair, desk, or monitor position fully compensates for static posture held over hours. Your muscles and joints need movement. The break routine matters as much as the gear.
For your eyes — the 20-20-20 rule: Every 20 minutes, look at something 20 feet away for 20 seconds. This resets the ciliary muscles that control focus. It takes 20 seconds and makes a real dent in the end-of-session eye fatigue most gamers assume is inevitable.
For your body — the posture check: Every 30 minutes, do a 10-second scan. Shoulders rolled up? Drop them. Chin jutting forward? Pull it back. Lower back rounded away from the lumbar support? Sit back into it. This interruption costs you less than a minute per hour and resets the muscular loading that causes soreness.
For your circulation: Stand up and walk around for 2–3 minutes every hour. Height-adjustable desks make this easier — you can switch to standing without leaving your station. But walking (even to the kitchen and back) is better than standing in place.
Full Setup: Priority Order and Budget Guide
If you’re building from scratch or adding one piece at a time, here’s the priority order:
| Priority | Component | Budget Pick | Mid-Range Pick | Price Range |
|---|---|---|---|---|
| 1 | Ergonomic Chair | AndaSeat Kaiser 3 ($399) | Secretlab TITAN Evo ($579) | $200–$1,500+ |
| 2 | Height-Adjustable Desk | Autonomous SmartDesk Core ($349) | FlexiSpot E7 Pro ($439) | $300–$950+ |
| 3 | Monitor Arm | Amazon Basics Arm ($35) | Ergotron LX ($199) | $25–$350+ |
| 4 | Desk Pad | Glorious XXL ($19) | SteelSeries QcK XXL ($29) | $15–$65 |
| 5 | Wrist Rest | Glorious Foam Rest ($13) | HyperX Wrist Rest ($22) | $12–$40 |
| 6 | Bias Lighting | Generic LED strip ($15) | Govee LED ($25) | $15–$60 |
The chair is the highest-impact upgrade for most gamers. A bad chair causes pain that cascades into bad monitor and keyboard positioning as you compensate. Fix the chair first, then work outward.
The desk is second because it unlocks the correct height for everything else. The monitor arm is third because it solves the height and distance problem that causes neck and upper-back strain. The desk pad and wrist rest are comparatively minor but complete the peripheral ergonomics.
For dedicated gaming chair options at every budget, our gaming chairs under $300 roundup and full gaming chair roundup cover the full range.
FAQ
What is the most important ergonomic upgrade for a gaming setup?
The chair. Everything else in the setup — monitor height, desk height, keyboard angle — is adjusted to match your seated position. A chair that doesn’t let you sit correctly, or doesn’t fit your body, makes every other ergonomic adjustment a workaround. Get the chair right first.
Do I need a standing desk for gaming?
Not required, but genuinely useful. A height-adjustable desk lets you set your desk surface to the exact height your chair requires, rather than the reverse. It also lets you alternate between sitting and standing during lower-intensity moments (loading screens, wait times, streams), which reduces the total time in static posture without interrupting actual play.
Should my monitor be at eye level for gaming?
The top edge of your monitor should be at or slightly below your eye level. Your gaze will naturally fall to the upper-center of the screen at a comfortable downward angle. A monitor set too low forces chin-down posture; too high forces chin-up. Both load the cervical spine during extended sessions.
Is a wrist rest good or bad for gaming?
Depends on how you use it. Resting your wrists on a pad during keyboard pauses and while waiting in game — fine and beneficial. Resting your wrists on a pad while actively mousing — actively bad, because it encourages wrist deviation and limits arm movement. Think of a wrist rest as a “between actions” tool, not a surface to press against while moving the mouse.
How often should I take breaks while gaming?
Every 20 minutes, look away from your screen for 20 seconds (20-20-20 rule). Every 30 minutes, do a quick posture check. Every hour, stand up and move for 2–3 minutes. These breaks become automatic over a few weeks and make a meaningful difference in how you feel after long sessions.
How much should I spend to build an ergonomic gaming setup?
A functional ergonomic gaming setup starts around $600–$700 total: a decent mid-range chair ($350–$400), a basic sit-stand desk ($300–$350), and a desk pad ($25). For most people, the Secretlab TITAN Evo + FlexiSpot E7 Pro combination around $1,000 covers both chair and desk at a level that will last 8–10 years. Add an Ergotron LX for $199 if your monitor isn’t at the right height on its stand.
Conclusion
The ergonomic gaming station in 2026 doesn’t require a $4,000 investment or a professional setup consultation. It requires the right priorities in the right order: a chair that fits your body, a desk at the correct height, a monitor positioned so your neck stays neutral, and peripherals that keep your wrists in a natural position.
The Secretlab TITAN Evo 2026 handles the chair. The FlexiSpot E7 Pro handles the desk. The Ergotron LX solves your monitor positioning. Add the SteelSeries QcK XXL and HyperX Wrist Rest to clean up the peripheral ergonomics.
If budget is the constraint, prioritize in the order listed above. Fix the chair before the desk. Fix the desk before the monitor arm. And run the break routine regardless of what gear you have — it costs nothing and fixes the one thing even the best setup can’t solve: sustained, unbroken static posture.
For streaming-specific ergonomics, see the ergonomic streaming setup guide.