Disclosure: PostureRanked is reader-supported. When you buy through links on our site, we may earn an affiliate commission at no additional cost to you. Our recommendations are based on independent research and testing.
| Product | Price | Rating |
|---|---|---|
| Topo Anti-Fatigue Mat by Ergodriven | $99 | 9.2 |
| WellnessMats Original Anti-Fatigue Mat | $149.95 | 8.5 |
| Ergotron LX Desk Mount Monitor Arm | $159.99 | 9.0 |
Disclosure: PostureRanked is reader-supported. When you buy through links on our site, we may earn an affiliate commission at no extra cost to you. Learn more
Standing desks are finally standard equipment in 2026—but most people set them up wrong from day one. Smart desks showcased at CES 2026, like Hexcal’s sensor-equipped workstations, now include motion sensors that detect your position—seated or standing—and prompt you to switch. What those sensors can’t do is fix your monitor height, correct your desk height, or tell you where to put your mat. That part is still on you.
Set up wrong, a standing desk gives you the same back pain as sitting—just in different spots. Your neck strains because your monitor is too low. Your shoulders hunch because your keyboard is too high. Your feet ache because you’re standing on hard flooring without a mat. This guide walks through every adjustment, in order, so your standing desk actually does what you bought it to do.
Quick answer: Your desk surface should sit at elbow height when you’re standing naturally (typically 40–45 inches for most people). Your monitor’s top edge should be at eye level, 20–28 inches away. Add an anti-fatigue mat and plan to switch positions every 30–45 minutes.
Step 1: Set Your Desk Height
This is the single most important adjustment and the one most people skip. Pull up the desk, set a “comfortable” height, and never touch it again. Wrong.
The correct method:
- Stand in your normal working posture—shoes on if you wear them at your desk
- Let your arms hang relaxed at your sides
- Bend your elbows to 90 degrees (forearms parallel to the floor)
- The desk surface should meet your forearms right at that angle
Your elbows should not reach up or drop down to reach the keyboard. If they do, adjust.
A common shortcut: measure your standing elbow height from the floor (the distance from floor to the inside of your bent elbow). That number is your starting desk height. Fine-tune from there.
Using dual presets: Almost every electric standing desk lets you save two height presets—one for sitting, one for standing. Use them. Trying to remember the “right” height every time you switch is how people end up at the wrong height half the day.
Step 2: Position Your Monitor at Eye Level
Your monitor height matters as much as your desk height, and most monitors on their built-in stands sit too low even when raised to maximum.
Target position:
- The top edge of your monitor should be at or just below eye level
- The screen should be 20–28 inches from your face (roughly arm’s length)
- Tilt the monitor slightly back—10–15 degrees—to reduce neck flexion
If your monitor is below eye level, you’re bending your neck forward all day. That’s 10–12 pounds of head weight pulling on your cervical spine at an angle. It adds up fast.
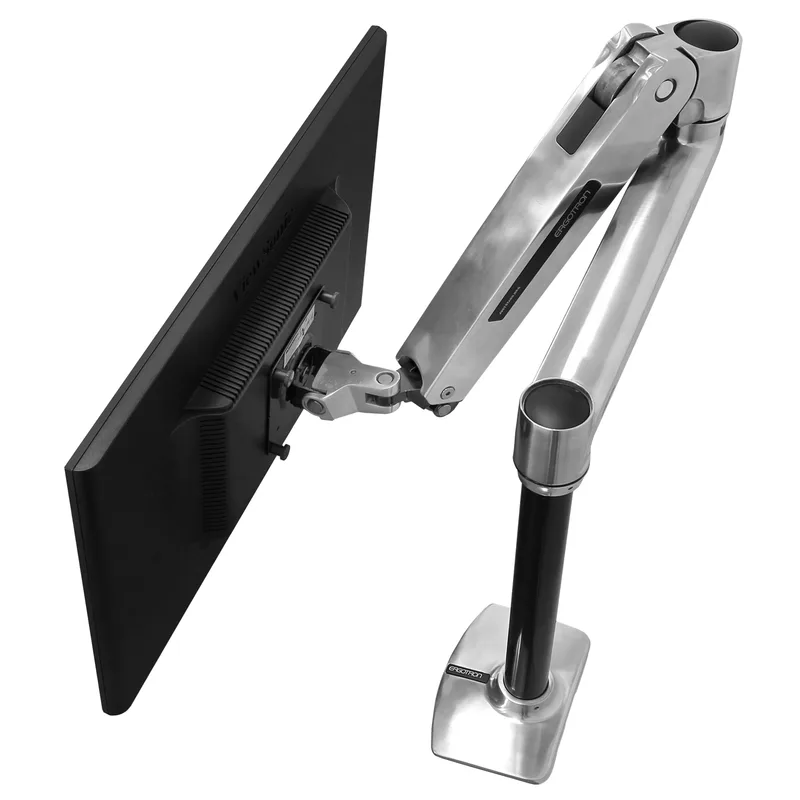
Ergotron LX Desk Mount Monitor Arm
Pros
- ✓ One-handed height adjustment moves with your desk
- ✓ Solid build quality that outlasts most desks
- ✓ Compatible with virtually all monitors
- ✓ Frees up significant desk surface area
Cons
- ✗ Premium price compared to basic arms
- ✗ Installation takes 15–20 minutes
- ✗ Grommet mount requires separate kit (B01FW15VN2)
Most stock monitor stands max out at 5–6 inches of height adjustment—not enough if you’re over 5’8”. A monitor arm like the Ergotron LX solves this completely. It also moves with your desk height when you switch between sitting and standing, which a fixed stand can’t do without manual repositioning.
Step 3: Position Your Keyboard and Mouse
With the desk at elbow height:
- Keyboard: Place it so your wrists are straight and level or angled slightly downward. If your keyboard has a tilt leg, fold it flat (or close to flat)—most people use it raised, which bends the wrists back. That’s the opposite of what you want.
- Mouse: On the same surface as the keyboard, directly beside it. Not off to the side where your arm has to reach. Keep it close.
- Keyboard tray: If your desk surface feels too high after setting it to elbow height, a negative-tilt keyboard tray can help. The 3M AKT80LE ($225 on Amazon) drops the keyboard below desk level and tilts forward, which is ergonomically ideal for heavy typists.
A common mistake: raising the desk to stand, then reaching the keyboard far forward on the desk surface. Move the keyboard too—it should always be right at your elbows.
Step 4: Place Your Anti-Fatigue Mat
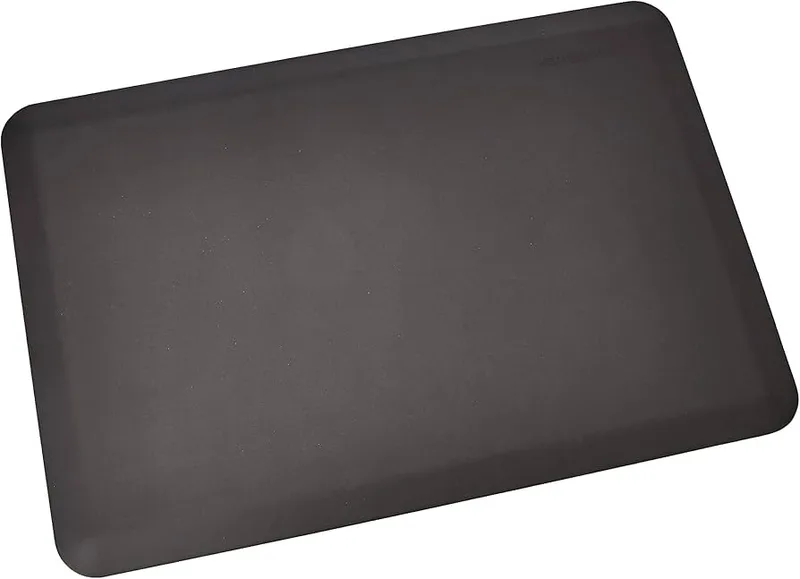
WellnessMats Original Anti-Fatigue Mat
Pros
- ✓ Flat surface means zero adjustment period
- ✓ Industry-best 20-year warranty
- ✓ Antimicrobial surface wipes clean in seconds
- ✓ Multiple sizes up to 6' long for full coverage
Cons
- ✗ No terrain variation limits movement benefits
- ✗ Higher price than most flat mats
- ✗ Heavier and less portable than contoured designs
Standing on a hard floor—tile, hardwood, even carpet—compresses your joints and causes fatigue much faster than standing on a cushioned surface. An anti-fatigue mat is mandatory, not optional.
Placement: Directly in front of your desk, centered where you stand. Not to the side, not pushed against the desk frame. You should step onto it and stand naturally without shifting your position.
Two main types:
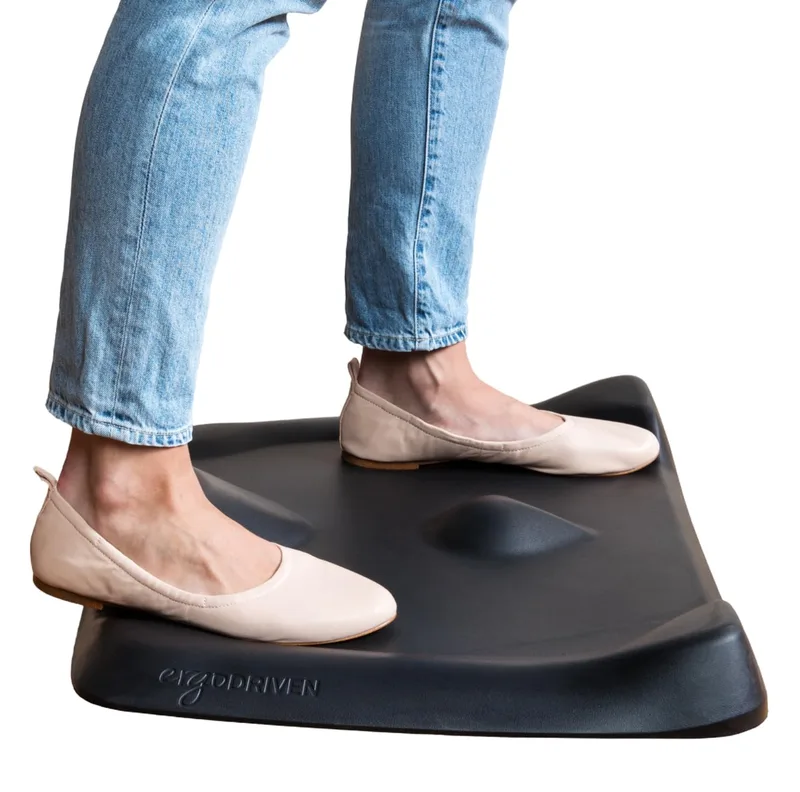
Topo Anti-Fatigue Mat by Ergodriven
Pros
- ✓ Contoured terrain encourages constant foot movement
- ✓ Most durable foam construction in this category
- ✓ Multiple color options to match your desk
- ✓ 30-day free exchange policy if sizing is wrong
Cons
- ✗ 29" width takes up significant floor space
- ✗ Terrain surface feels awkward for the first week
- ✗ Pricier than basic flat mats at the same thickness
Contoured mats (like the Topo by Ergodriven) have terrain bumps and a raised center zone that encourage constant small foot movements. This keeps blood flowing and reduces the static load on your joints. The learning curve is real—the uneven surface feels strange for about a week—but most people who try both prefer the contoured style for long sessions.
Flat mats (like WellnessMats) have no terrain variation but deliver excellent cushioning through thick, dense foam. Easier to walk onto, easier to clean, and better-looking in executive or minimalist setups. The WellnessMats 20-year warranty is genuinely exceptional—longer than most people keep their desks.
WellnessMats Original Anti-Fatigue Mat
Pros
- ✓ Flat surface means zero adjustment period
- ✓ Industry-best 20-year warranty
- ✓ Antimicrobial surface wipes clean in seconds
- ✓ Multiple sizes up to 6' long for full coverage
Cons
- ✗ No terrain variation limits movement benefits
- ✗ Higher price than most flat mats
- ✗ Heavier and less portable than contoured designs
Both are solid choices. If you move around your desk frequently or hate clutter, a flat mat is simpler. If you stand for more than two hours a day, a contoured mat is worth the adjustment period.
Step 5: Follow a Sit/Stand Schedule
A standing desk does nothing if you leave it in one position all day. The goal is regular position changes, not replacing sitting with standing.
Starting schedule for new users:
- First 2 weeks: 20 minutes standing, 40 minutes sitting
- Weeks 3–6: 30 minutes standing, 30 minutes sitting
- Goal: 45–60 minutes standing per hour with movement breaks
Standing for 8 hours straight is hard on your legs, feet, and lower back—sometimes worse than sitting. The evidence on standing desks is clear: the benefit comes from alternating, not from standing more overall.
Practical tip: Set a timer or use your desk’s built-in reminder feature if it has one. New in 2026, desks like the Hexcal Studio and other smart workstations include motion sensors that detect when you’ve been in one position too long and alert you to switch. If your desk doesn’t have this, a phone alarm works just as well.
For a deeper look at optimal standing time ratios, see our guide on how long to stand at a standing desk.
Step 6: Cable Management and Final Touches
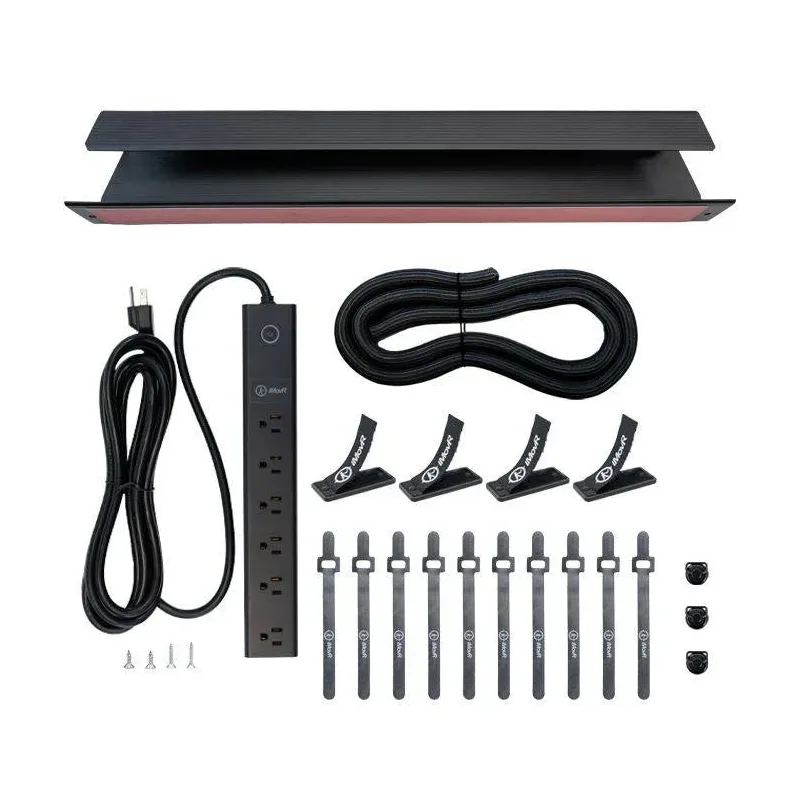
Once the main setup is done:
- Cable management: Route cables up the back leg of the desk frame. Most electric desks include a cable spine or management clips. Loose cables that hang and catch when the desk moves are a safety hazard and an annoyance.
- Lighting: Position your monitor so you’re not facing a window directly. Glare forces you to lean toward the screen, which collapses all your positioning work.
- Footwear: Shoes make a difference. Barefoot or socked standing on a mat puts more load on your arches than shoes with arch support. Some people find a dedicated pair of supportive indoor shoes extends their comfortable standing time significantly.
Standing Desk Height Reference Chart
Use this table to find your starting desk height. These are ranges because elbow height varies even within the same overall height. Measure yourself to confirm.
| User Height | Desk Height (Standing) | Monitor Top Height (Floor) |
|---|---|---|
| 5’0” (152 cm) | 36–38” | 50–52” |
| 5’4” (163 cm) | 38–40” | 52–54” |
| 5’6” (168 cm) | 40–42” | 54–56” |
| 5’8” (173 cm) | 41–43” | 55–57” |
| 5’10” (178 cm) | 43–45” | 57–59” |
| 6’0” (183 cm) | 44–46” | 58–60” |
| 6’2” (188 cm) | 45–47” | 59–61” |
| 6’4” (193 cm) | 46–48” | 60–62” |
Monitor top height assumes a 27” screen. Adjust ±1” for smaller or larger displays.
What You Actually Need to Buy
Most standing desk setups only need a few additions beyond the desk itself. Here’s what’s worth the money and what isn’t.
Worth buying:
- Anti-fatigue mat — Non-negotiable for anyone standing more than 30 minutes at a time. The Topo by Ergodriven is the best overall at $99. Prefer a flat surface? The WellnessMats Original runs $149.95 but carries a 20-year warranty.
- Monitor arm — If your monitor is on a fixed stand, you’ll be repositioning it every time you change desk height. A monitor arm like the Ergotron LX ($159.99) makes this automatic.
- Separate keyboard — If you use a laptop, a separate keyboard at elbow height lets you push the laptop back and raise it to eye level on a stand. Without this, you’re staring down at a screen 8–10 inches below where it should be.
Often skipped but useful:
- Wrist rest — Helps during long typing sessions at height, especially if your desk surface is hard edged.
- Footrest for sitting mode — If you’re shorter and your feet don’t reach the floor comfortably when sitting, a footrest prevents the edge of your seat from cutting off circulation.
Not worth it for most people:
- Fancy cable management trays — Basic velcro straps and a power strip do the same job for $10.
- Balance boards — More instability than anti-fatigue benefit. Fine for occasional use, but standing on a board while typing or taking calls is distracting and doesn’t outperform a good contoured mat.
For full product comparisons, see our guides on the best standing desks and the best anti-fatigue mats for standing desks.
FAQ
What height should my standing desk be set to?
Your desk should be at elbow height when you’re standing normally—arms relaxed, elbows bent to 90 degrees, forearms parallel to the floor. For most people between 5’6” and 5’10”, that’s 40–44 inches. Measure your own standing elbow height for precision.
Is it bad to stand at your desk all day?
Yes. Standing all day causes the same circulatory issues as sitting all day, plus added strain on your feet, knees, and lower back. The research-backed goal is to alternate between sitting and standing throughout the day—roughly 30–45 minutes of standing per hour. See our full guide on how long to stand at a standing desk.
Do I need an anti-fatigue mat for a standing desk?
If you’re standing on a hard floor for more than 20–30 minutes at a time, yes. Anti-fatigue mats reduce joint compression and muscle fatigue meaningfully. They’re one of the best value upgrades for a standing desk setup—see our best anti-fatigue mats guide for full comparisons.
Why does my back hurt more when I stand than when I sit?
Usually one of three causes: desk is at the wrong height (too low forces you to hunch, too high causes shoulder elevation), monitor is too low (forces neck flexion), or you’re standing in a static position without movement. Check all three. An anti-fatigue mat that encourages foot movement helps with the static posture issue.
How far away should my monitor be when standing?
The same distance as when sitting: 20–28 inches from your eyes. The standing position shouldn’t change your monitor distance. If it does, the monitor is on a fixed stand and you need to reposition it every time you switch heights—that’s the case for getting a monitor arm.
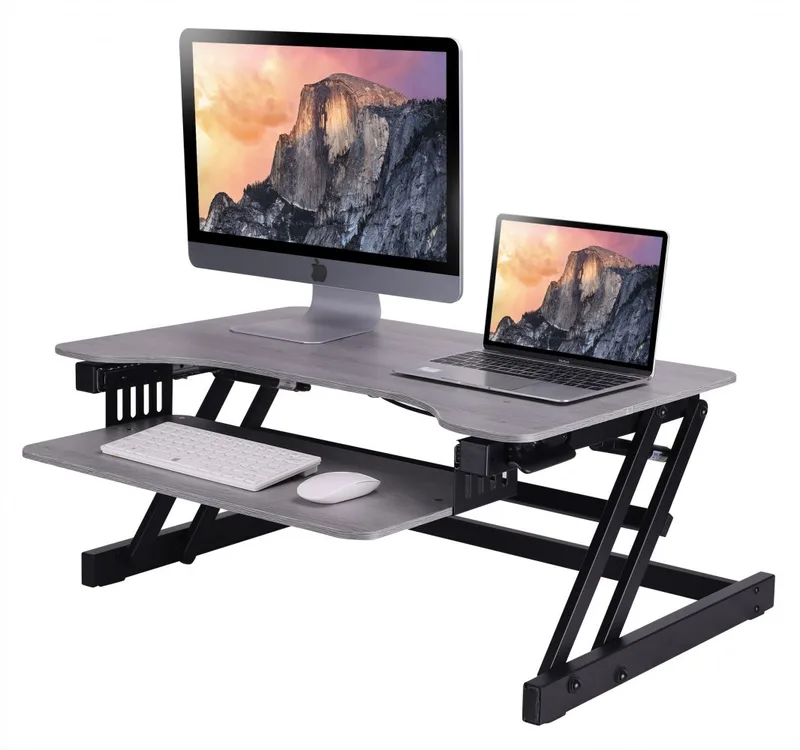
Can I use a converter on a regular desk instead of buying a standing desk?
Yes, and it’s often the right call if you’re not ready to commit to a full desk. Sit-stand converters sit on top of a regular desk and raise your monitor and keyboard together. They have limitations—less stability, smaller work surface—but are much cheaper to try. See our standing desk vs converter comparison for help deciding.
Conclusion
Standing desk setup isn’t complicated, but the details matter. Get the desk height right first—everything else builds on that. Then position the monitor so you’re not craning your neck down. Add a mat. Set a schedule and actually switch positions.
The best standing desk setup is the one you actually use correctly. A $2,000 desk at the wrong height is worse for your body than a $300 desk set up right.
The essentials:
- Best anti-fatigue mat overall: Topo by Ergodriven ($99) — contoured terrain, 7-year warranty, most popular with standing desk users
- Best flat mat: WellnessMats Original ($149.95) — no-fuss flat design, 20-year warranty, made in USA
- Best monitor arm: Ergotron LX ($159.99) — adjusts in seconds, holds any monitor up to 25 lbs, built to last
For more, see the complete standing desk setup guide and our best standing desks in 2026 roundup.